When I made the header art for this site, I knew just the photograph I wanted: an attractive woman wearing red-and-blue glasses, looking at the logo, expressing both surprise and happiness. And the photo had to be in 3-D. As you can see at the top of this page, I got just what I wanted. But I didn't find what I wanted; I had to make it.
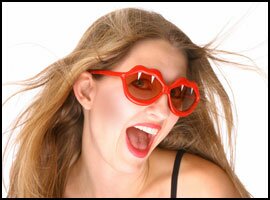
Here's what I found: a stock photograph by Sharon Dominick, on iStockphoto.com. (And by the way, if you're not buying your stock photos from iStockphoto, you are wasting money. Go sign up with iStockphoto, or you're fired.)
I could tell right away that -- besides facing the wrong way, and looking in the wrong direction, and not wearing 3-D glasses, and having hair blowing everywhere, and being only two-dimensional -- this girl was perfect. Simply perfect. Well, she wasn't quite happy enough, either. But perfect besides that. So I bought the photo.
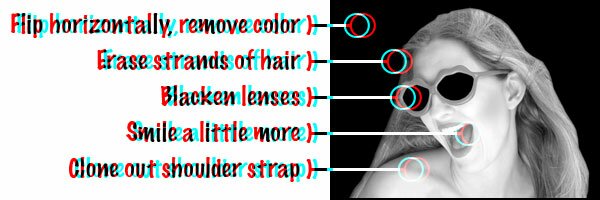
To fix the parts that wouldn't work with my layout, I retouched the photo. I flipped the image so she faced leftwards, erased some of her hair, blacked out the lenses of the glasses, cloned out her shoulder strap, and pulled her mouth ever-so-slightly into a happier smile.

That was the easy part. But she still wasn't in 3-D. Usually, you make a 3D photo by using two separate images shot from slightly different angles. But how do you make a 3D photo from a single flat image?
I did it by making a layered Photoshop file. Each layer contained just a little less of the image than the one below it. The bottom layer had the whole portrait; the next layer, just the head; the next layer, the chin and face; and so on, until the top layer just had her nose and glasses.

The trick here is to feather the edges of your eraser just right. If you use hard edges everywhere, the edges of your layers will show up in the 3D image, and make her look like she's made of construction paper. In most places, you want to use feathered edges to make smooth transitions from one layer to the next. But in some places, you want a hard edge, for a sharp transition (such as where her glasses appear in front of her hair).
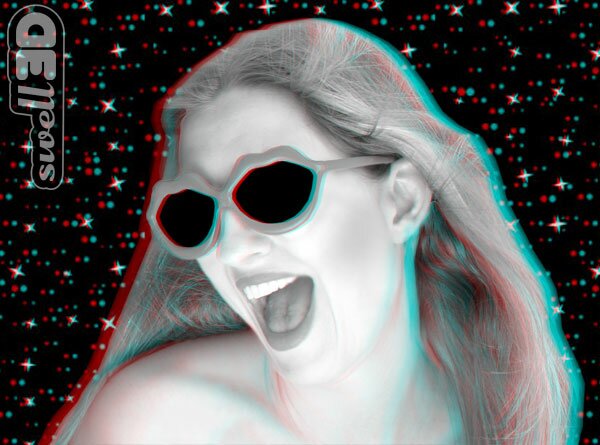
After that, I made a copy of every layer so I had two full sets. I colored one of these sets red and the other cyan, and moved the layers to simulate the two different viewing angles. Merging them into one anaglyph image gives me this:

For my header art, I colored her lenses blue and red, but I reckon I'll leave them black here. She looks pretty cool.
No matter how hard you work at it, you'll never turn it into a true stereoscopic photo. But you can come pretty close, probably close enough to fool most people, especially if you plan to use it at a smaller size, such as in my header.


thanks for sharing
Excellent! Thanks for your posting.